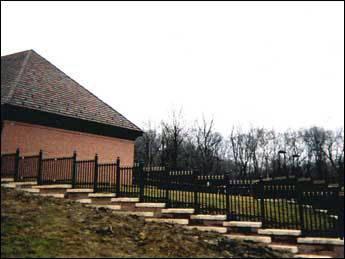
Curved fences increase the attractiveness of a fence line and can solve some tricky layout problems. They can skirt trees, large rocks, and other obstructions. Round corners can help a fenced area seem less cramped.

Curved fences have some structural limitations, however. They’re difficult to construct between post spans shorter than 4 feet or longer than 6 feet, they need at least three posts, and the infill has to be narrow, especially in tight curves. Even if you draw the curve precisely on your final plan, you may need to change it to fit the realities of the actual location.

When you set the posts, note their orientation; for most infill styles the post faces should fall on the arc line.

Scribe arc on ground

Drive a pipe, landscape spike, or stake on the compass line at the point where you want to center the curve. Note that the placement of this “compass point” will determine the depth of the arc and the radius of the curve. Loop one end of a length of mason’s line around the center point and tie a short piece of ‘/2-inch rebar to the other end. Scribe the arc of your curve in the ground with the rebar.

Mark each post location on the arc you scribed and dig the holes. Set the posts in each hole and brace them. Run the mason’s line from the compass point to the post and use a framing square to make sure the post is perpendicular to the line.

Laying out sloped fences

Fencing a slope calls for some modification of the basic layout techniques. Essentially you have two options— contoured fencing or stepped fencing.

slope

Contoured fencing is easier to install, especially on irregular or rolling slopes. The rails of a contoured frame run parallel to the slope and to each other, and the infill is cut to follow the slope. Rail fences and fences with surface-mounted infill make good contour models. Inset infill does not work well with this type.

Stepped fencing resembles a stairway—its rails run horizontally and parallel to each other, and each bay steps down the slope by an equal or unequal amount, depending on how you want the design to look. Stepped fences are more difficult to plan and install so they are better suited to straight slopes. Almost any board fence can be adapted to a stepped fence.

Marking postholes on a slope requires a different technique than marking them on level ground. If you mark the width of the bays on the sloped ground, the posts will end up closer together than you want them. To space the posts correctly, you must mark them from a level line.

To establish a level line, drive a stake at each end of the slope where the end posts will be. Make the lower stake tall enough to be level with the top of the grade. Tie mason’s line tightly between the stakes. On short slopes tie the upper end at grade level and slip a line level on it. On long slopes tie the line about a foot above grade so you’ll have room to use a water level to level the line at the lower stake. Mark the line with tape at intervals equal to your bay width and drop a plumb bob from each mark to locate the postholes.

Staking a contoured layout

To stake out a contoured fence, establish a level line and mark the posthole locations. Then take down the stakes from the level line and drive batter boards at both the top and bottom of the slope and at every change in grade. Tie mason’s line between them. Adjust the position of the line so it follows the fence line along its length. Adjust any posthole markers that don’t fall directly under the mason’s line.

To stake out a stepped fence, establish a level line and mark post locations as described. Set each post in concrete, leaving the posts taller than their final length. Let the concrete cure.

Measure the exact rise and run of the slope and determine the step-down distance for each bay.

Mark the step-down—measuring from the top—on the uppermost post. With a water level, mark the next post at that height. Cut that post to height, mark the step-down on it, and repeat for the next post.